
Worm castings are an amazing fertilizer for the garden, but bagged worm castings are pricey. You can actually turn your garbage into worm castings! Here is how you can make your own worm castings.

I have used worm castings in my garden, and I use them to make my homemade potting soil. Now that I use them so much I was curious if I could make my own.
I researched it and found many ways to make a worm bin that I could harvest castings from and I finally decided on a design.
I will walk you through how I made my worm bin and how I take care of it so I can harvest my own worm castings.
How To Make A Worm Bin
To make your own worm castings the first thing you will need is a home for your worms. There are many worm bins online that you can buy, but I built my own for way less than the prebuilt ones.
My worm bin consists of three five gallon buckets and a lid, Yep that's everything you need to make a worm bin. Here is how I constructed this worm bin.
Making Your Own Worm Bin
Once you have your 3 stacking five gallon buckets you will need to do a little work to get them ready. I first used a drill bit to drill holes in just 2 of the buckets.
These holes will allow the worms to move inside the bin. Only drill holes in two of the buckets and leave the third one intact.

They don't need to be perfectly placed holes so don't worry about that.
After you have the holes drilled you can stack the buckets up for use. The bottom most bucket should be the one that has no holes in it.
Drilling the holes for this simple worm bin is all you need to do! Now you have a completely ready to use worm bin.
The buckets that you drilled the holes in will house the worms. You might be curious how this whole bin operates, let me tell you.
How Does this worm bin work
This style of worm bin is super simple to use. When you first get your worms they will go in the middle bucket along with bedding and food.
Once the worms eat all the food and turn that layer into castings you can start filling the second bucket with food and bedding.
The worms will travel through the drilled holes into the second bucket. Once they have left the first bucket you can remove the worm castings from that one and placed it back on top.

This creates a cycle of worms eating and travelling into another bucket. This is one of the easiest ways to make your own worm castings.
The bottom bucket keeps the worms form escaping the bin and it will catch drippings from the other layers. The liquid that collects in the bottom bucket is a great fertilizer that can be diluted and used to water plants with.
What worms should I get
Now that you have a home for your worms you are going to need worms! I got my worms from Uncle Jim's Worm Farm and I was very pleased with them!
I bought the red wiggler composting worms which are great for turning food scraps into castings. For my worm bin I bought there smallest pack of worms they offer which comes with 100 red wigglers.

You can find the exact worms I bought right here. Once they arrived I put them in my already prepared worm bin.
How to prepare your worm bin
Your worms will ship fast, so you need to be prepared for them once you place your order. The first thing you will need for your new worms is newspaper.
Make sure the newspaper is 100% black and white because these inks are safe. Cut or rip the newspaper into small pieces and layer the bottom of the middle bucket with it. I lightly misted this paper because it was so dry.

Once you have about an inch or two of the bucket filled with newspaper you now need to add in some bedding. I use coconut coir like this for my worms. Here are some other bedding options.

When you get your worms you can dump them into the middle bucket right on top of the bedding. The worms will eventually dig into the bedding and make it their new home.

My worms were very active and tried to get out of the worm bin, but I learned that this is a normal behavior. For the first week or two the worms will try to escape from their bin.
To keep them inside the bin you can shine a bright light right on top of the bin. The worms don't like the light and it will keep them from escaping.
What should I feed my worms
After a a day or two you should feed your worms because they will be hungry! Here are some things that I like to feed my worms.
- Banana peels
- Pepper cores
- Apple cores
- Potato peels
- Carrot shavings
- Old lettuce
- Old fruit like strawberries or blueberries
Worms can eat so many different things that I don't think I could list them all. To simplify it you can feed your worms most vegetable scraps.

Worms should not be fed hot peppers, onions, garlic, meat products, milk, bread, anything with salt, or oils. I like to feed my worms mostly vegetable scraps.
Another thing I like to put in my worm bin is spent coffee grounds. Be careful and use them sparingly because they can affect soil ph.
Worms are so amazing because they will take these old food scraps and turn them into a high quality fertilizer!
How To Feed Worms
There are many methods for feeding worms, but I am just going to tell you about the one I found the most simple.
I burry my food scraps in the worm bedding starting in the middle bucket. I simply dig a little hole in the bedding and throw their food in it before covering it up.

The worms will quickly travel to the food and start devouring it. The food will start to decompose and eventually be turned into worm castings.
I like to keep adding to the food supply once I notice the other food being eaten. I read so many rules on feeding them, but I have found that personal judgement on feeding them is best.

I will keep adding to this layer of bedding until its time to harvest some worm castings from the worm bin.
Where should I store my worm bin
Your worm bin can be stored in many places around your home. Worms like their bedding to be right around room temperature.
Here are some places you could store your worm bin.
- Basement
- Garage
- Greenhouse
- Shed
- Kitchen
I am currently storing my worm bin under a shelf in my greenhouse. So far my worms are really thriving and eating all my food scraps.
When looking for a place to store your worm bin think about where worms live. They like cool soil and darkness.
Don't place your worm bin in direct sunlight or an area that will frequently get above 85oF. You should also keep your worms out of freezing weather.
You can move your worm bin outdoors during the warm months and back inside for the cooler months.
When can I harvest worm castings
You have built your worm bin, received your worms and put them into their new home, and finally fed them. Your worms should have now turned those food scraps into black gold (worm castings)!
If you are looking for a hard and fast rule of when you can harvest worm castings, I am not going to give you one. Worms are living organisms and some may eat faster or slower than others.
To know when you should harvest worm castings you should use your own pair of eyes! Here are some signs I look for when its time to harvest castings.
- All the food has been eaten in that layer of bedding
- The bedding has turned to an almost black color
- The worm population is healthy and has not declined
Once I notice these three things I now know that I can now harvest some fresh castings. Before I do harvest them I first need to get the worms out of that layer of bedding.
To get them out of the bedding I will start adding food scraps to the top bucket. I will keep adding food scraps and bedding to this bucket.
When you stop adding food to the finished layer the worms will travel to the top bucket to find food. They may not all travel up, but most of them should.
Once you notice that the worms have started eating in the top bucket you can now dump the middle bucket of castings out. If you find any worms still in these castings simply throw them in the top bucket with the others.
Will My Worms Reproduce
Yes! your worms will double about every two months. Sometimes the older worms will die off and decompose, but the worms will still grow in population.
I like to keep my worm bin from getting too crowded because this is not healthy for the worms. If you notice that your worm population is getting to large here is what you can do with the extras.
- You could create a new worm bin by using worms from your current bin.
- Make a new worm bin and give it as a gift to a fellow gardener.
- Use the worms for fishing
- Sell them to gardeners so they can make their own worm castings (check with local laws)
- Feed them to your chickens or indoor pets like frogs and lizards
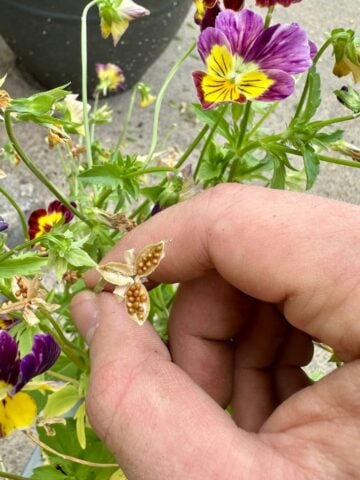
The good news is that as your population grows your worms will create worm castings faster. You should notice baby worms and worm eggs that will look like this.

Conclusion
Making your own worm castings is a great way to turn garbage into high quality fertilizer. You only have to buy worms once and they will continue to multiply and make castings for you!
Pin This!

Leave a Reply