
Heirloom tomatoes are, by far, one of the most rewarding vegetables to grow. Learn to grow them from seeds, and you will have a large variety available to you.

| Botanical Name | Solanum lycopersicum |
| Plant Type | Annual vegetable/fruit |
| Sun exposure | Full sun |
| Soil conditions | Rich soil that has a neutral or slightly acidic PH |
| Bloom and harvest time | Summer |
| Difficulty | Easy, Medium, Hard, Extreme |
You will notice that I labeled tomatoes hard to grow, I would put them in the medium category, but seed starting can be difficult.
The first time I tried to grow tomatoes from seed, I failed miserably. All of my seedlings died because of my inexperience.
I am now able to grow healthy and robust tomato starts and I even grow them for my friends and family!
If you want lush tomato plants, bountiful harvests, and nutrient dense tomato fruit, keep reading for my step-by-step growing guide.
Choosing Heirloom Tomato Seeds
Just pick up any heirloom seed catalog and you are flooded with tomato seeds! I recommend growing a handful of varieties so you can find a favorite.
Below are some of my personal favorites that I grow every year.
- Sheboygan: A great, plump and pink, roma variety. Good for slicing or making into sauce.
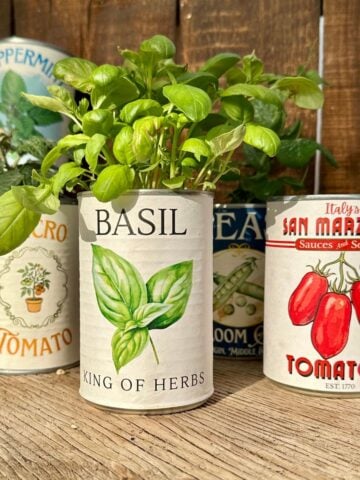
- San Marzano: The most trustworthy tomato you can grow. A wonderful paste roma originating from Italy.

- Micro Tomatoes: These miniature plants can be grown in six inch pots!
I grow these varieties every year, and I trial some new varieties as well.
When To Start Your Tomato Seeds
Start your tomato seeds 6-9 weeks before your last frost date. You can use this website to find your average last frost date.
Supplies Needed To Start Tomato Seeds
I neglected spending enough on seed starting supplies when I first attempted to grow seedlings. If you go cheap, you will wind up with seedlings that are weak.

Here are all of the things you will need to start your own tomato seedlings.
- Tomato Seeds: Here are my favorite companies to buy seeds from.
- Potting Soil: I highly recommend mixing your own. Use my recipe.
- Pots: I start with small cells and later transplant to larger pots.
- Grow Lights: An absolute must! I now use this grow shelf, but a single light panel is less expensive if you are just starting out.
- Heat Mat (optional): I highly recommend this especially if your house is cool.
Planting Tomato Seeds Indoors
Once your seed starting date has arrived and you have all your supplies, it is finally time to plant those seeds.
Start by getting your potting mix moist before adding it to your seed starting cells. This will keep the seeds in place and allow the soil to get moistened deeply.
If you don't moisten the soil first, your seeds and dried soil can float away when you water. Next, plant one or two seeds per cell ¼" deep.
If you plant multiple seeds in one cell you will need to thin them later. If you just plant one seed per cell, you can just replant the ones that don't germinate.

Finally, set your heat mat to 75oF-80oF and keep the soil moist until your seeds emerge.
Growing Tomatoes From Seeds To Planting
This is where people often kill their tomato plants, and it is the most fragile time in a tomato plant's life.

Below are the things you should do to keep your tomato plants healthy, followed up by what can go wrong, and how you can fix it.
Remove Humidity Domes
I don't use humidity domes as I believe they cause more issues than benefits. If you do use them, remove them once your tomatoes have sprouted or the humidity levels will be too high.
Allow The Soil To Dry Between Watering
If you keep your tomato plants too moist, it will cause major issues. Allow the top layer of soil to get dry before you water, and when you water, water deeply.
Don't Fertilize
If you use my DIY potting soil mix, it already has this slow release fertilizer in it and you won't need to fertilize the plants.

Keep The Lights Low
Not dim, but low. Your grow lights should only be 2-3 inches away from the top of your plants. This prevents the plants from becoming to leggy.
If you struggle with leggy seedlings read my full post on preventing leggy seedlings.
Potting Up
Your tomato plant's roots need plenty of space to grow. Once your plants are around the size of the plant below, pot them up.

Use a 4" pot and move the smaller tomato plants into the large pots. You can plant them deeply while using the same DIY potting mix you started them with.
Things That Can Go Wrong
The number one reason people lose tomato plants is damping off. This is a totally preventable and solvable issue.
Here is an article where I outline natural ways you can prevent, and stop damping off disease. It's a must read if you are going to grow healthy tomato plants.
Hardening Off Tomato Starts
When the weather starts to warm up, it is finally time to acclimate your tomato plants to the outdoors.
You cannot just transplant tomatoes that have been indoors their whole life, as you must slowly get them used to the outdoors.

Here is a great schedule to follow for hardening off your tomato plants. Do this once all threat of frost has passed. At the end of this schedule you can finally put your tomatoes in the garden.
- Day 1: Put your plants in a shaded area (unless cloudy) that is protected from the wind for 4-6 hours and then bring them indoors (or into your greenhouse)
- Day 2: Increase the time outdoors, in the same protected and shaded location, by 4 hours.
- Day 3: Increase the time outdoors by another 4 hours. Some sun exposure is okay at this point, just no extremes.
- Day 4: Keep your plants outside for 16-18 hours and allow them to experience some sun and wind. Bring them in overnight.
- Day 5: Your plants are ready to put in the garden. If you want to play it safe, you can leave them outdoors in their pots for a full day and night before planting.
Transplanting Tomatoes
When choosing a spot in your garden to plant your tomatoes, choose the sunniest spot. Tomatoes planted in full sun grow faster and produce more fruit than those planted in shade.
When transplanting your tomatoes, you need to plant them deep and provide nutrients. Tomatoes are heavy feeders so they need plenty of fertilizer.

Right before transplanting, pull off the tomato leaves from the bottom half of your plant. Then plant your tomatoes so that at least half of the plant is above the soil.
You might have to dig a deep hole, but planting tomatoes deeply causes more roots to grow along the stem. This helps the tomato plant withstand dry weather.
I also add fertilizer to the hole that I plant my tomatoes in. I add a few handfuls of compost, coffee grounds, or other organic fertilizers.
Keeping Tomatoes Healthy In the Garden
Here are all the things I do to keep my tomatoes healthy once they are in the garden.
Cage Your Plants

After transplanting, give your plants supports to grow on. Tomatoes can be grown up a trellis or they can be grown in the traditional tomato cage.
Mulch
Mulch reduces weed pressure, keeps the soil moist, and prevents dramatic temperature changes in the soil.
Mulch around your tomato plants with materials like grass clippings, straw, or dead leaves.
Water Deeply, Not Often
Your tomato plants will need about 1" of rain a week. If they don't receive this rain and the soil starts to dry, you will need to supplement their water.
When watering, I like to water deeply, but not often. This trains the plants to grow deeper roots and prevents diseases, as your plants are wet for shorter periods.

Watering deeply once a week during dry spells should be plenty.
Fertilize Naturally
Tomato plants need plenty of nutrients to grow and produce well. Make sure to give your tomato plants plenty of nutrients.
Here are some of my favorite homemade fertilizers that I use. Compost or fish emulsions can be applied around your tomatoes on a biweekly basis.
Preventing Disease
The number one disease that I see on gardener's tomato plants is blight. This fungal disease comes from the soil and can be treated naturally.
Here is my post on controlling tomato blight naturally.
Harvesting Healthy Tomatoes
For most varieties, you should get tomatoes from your plants 90-100 days after planting. Below are all the steps you should take to ensure you get a large harvest of healthy tomato fruit.
Getting Green Tomatoes To Ripen
You may have a plant covered with green tomatoes, but none are turning red. When a tomato ripens, is all dependent on the weather.
There really is no good way to speed up ripening in my opinion. Pruning away some of the foliage, so the tomatoes get full sun, may help but otherwise, patient is key.

Blossom End Rot
This disease causes tomatoes too rot from the blossom end. This is usually caused by a lack of water or lack of calcium.
Water your plants with milk and this issue should go away.
Preventing Splitting Tomatoes
There is nothing worse that having a great looking tomato, only for it to split on the vine. The good news is that this is preventable.
The 1# cause for splitting is swings in soil moisture. To prevent this, keep the soil consistently moist and provide water during dry weather.
If you water your tomatoes after dry weather they will split, so it is best to harvest the ripe tomatoes first and then water.
Harvesting Tomatoes Properly
You have done it! You have grown your own heirloom tomatoes from seeds and now you get to harvest them.
To harvest, simply hold onto the green tomato stem above the fruit and pull up. A ripe tomato should easily release from the vine.
Now carefully bring them to the kitchen and make something tasty!
Saving Tomato Seeds
Do you want to grow the same varieties next year? Just save seeds from this year's tomatoes.
Pin This!

Leave a Reply